Scheduling Assistant In Outlook: The Basics
Coordinating meetings across busy teams often leads to last-minute rescheduling when calendar conflicts slip through. The built-in scheduling assistant in outlook helps surface available time slots before invites go out. This feature sits inside the standard meeting form and works with both personal and shared calendars in Outlook 365. Many professionals discover that once they start using it consistently, the number of follow-up emails drops dramatically. The tool already flags overlaps in real time.
Team leads and administrators who book meetings daily benefit most from mastering its pane. It shows attendee availability in a grid view so you can spot open blocks quickly. Many users already know the tool exists but skip key toggles that prevent double-bookings later. For example, a project manager at a mid-size consulting firm shared that enabling the “show only my working hours” filter cut her weekly rescheduling time in half. It removed irrelevant evening slots from the view.
The broader context here belongs to the Outlook Calendar Scheduling Assistant topic cluster. Precise steps matter more than add-in features. Understanding the native assistant first gives you repeatable habits that carry over to any meeting workflow. Think of it as your first line of defense before you ever consider third-party tools. The more fluent you become with the built-in options, the smoother every calendar interaction becomes.
The scheduling assistant in outlook pulls data from Exchange or Microsoft 365 accounts automatically. It gives you a single pane of glass instead of jumping between multiple calendars. Over time this habit reduces cognitive load and helps you book smarter rather than simply booking faster.
Step-by-Step Guide
- Open a new meeting in Outlook by clicking New Meeting on the Home tab or pressing Ctrl+Shift+Q. Fill in the subject line and add a short description so recipients know the purpose right away. Next click the Scheduling Assistant button in the ribbon. This action opens the side pane that displays everyone’s free and busy times in a single view. Spend a moment resizing the pane wider if your screen allows. The grid updates automatically once you add attendees. You will see color-coded bars for each person. It makes it easy to spot overlapping commitments without switching windows. If you work on a laptop with limited screen space, try dragging the divider. Give the grid at least 60 percent of the window so the color blocks remain easy to read at a glance.
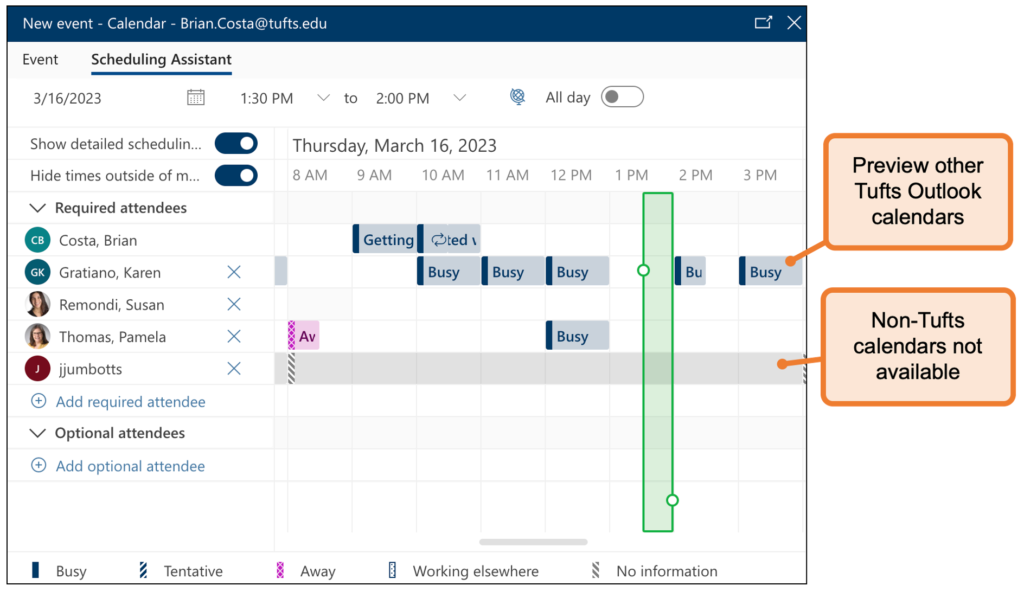
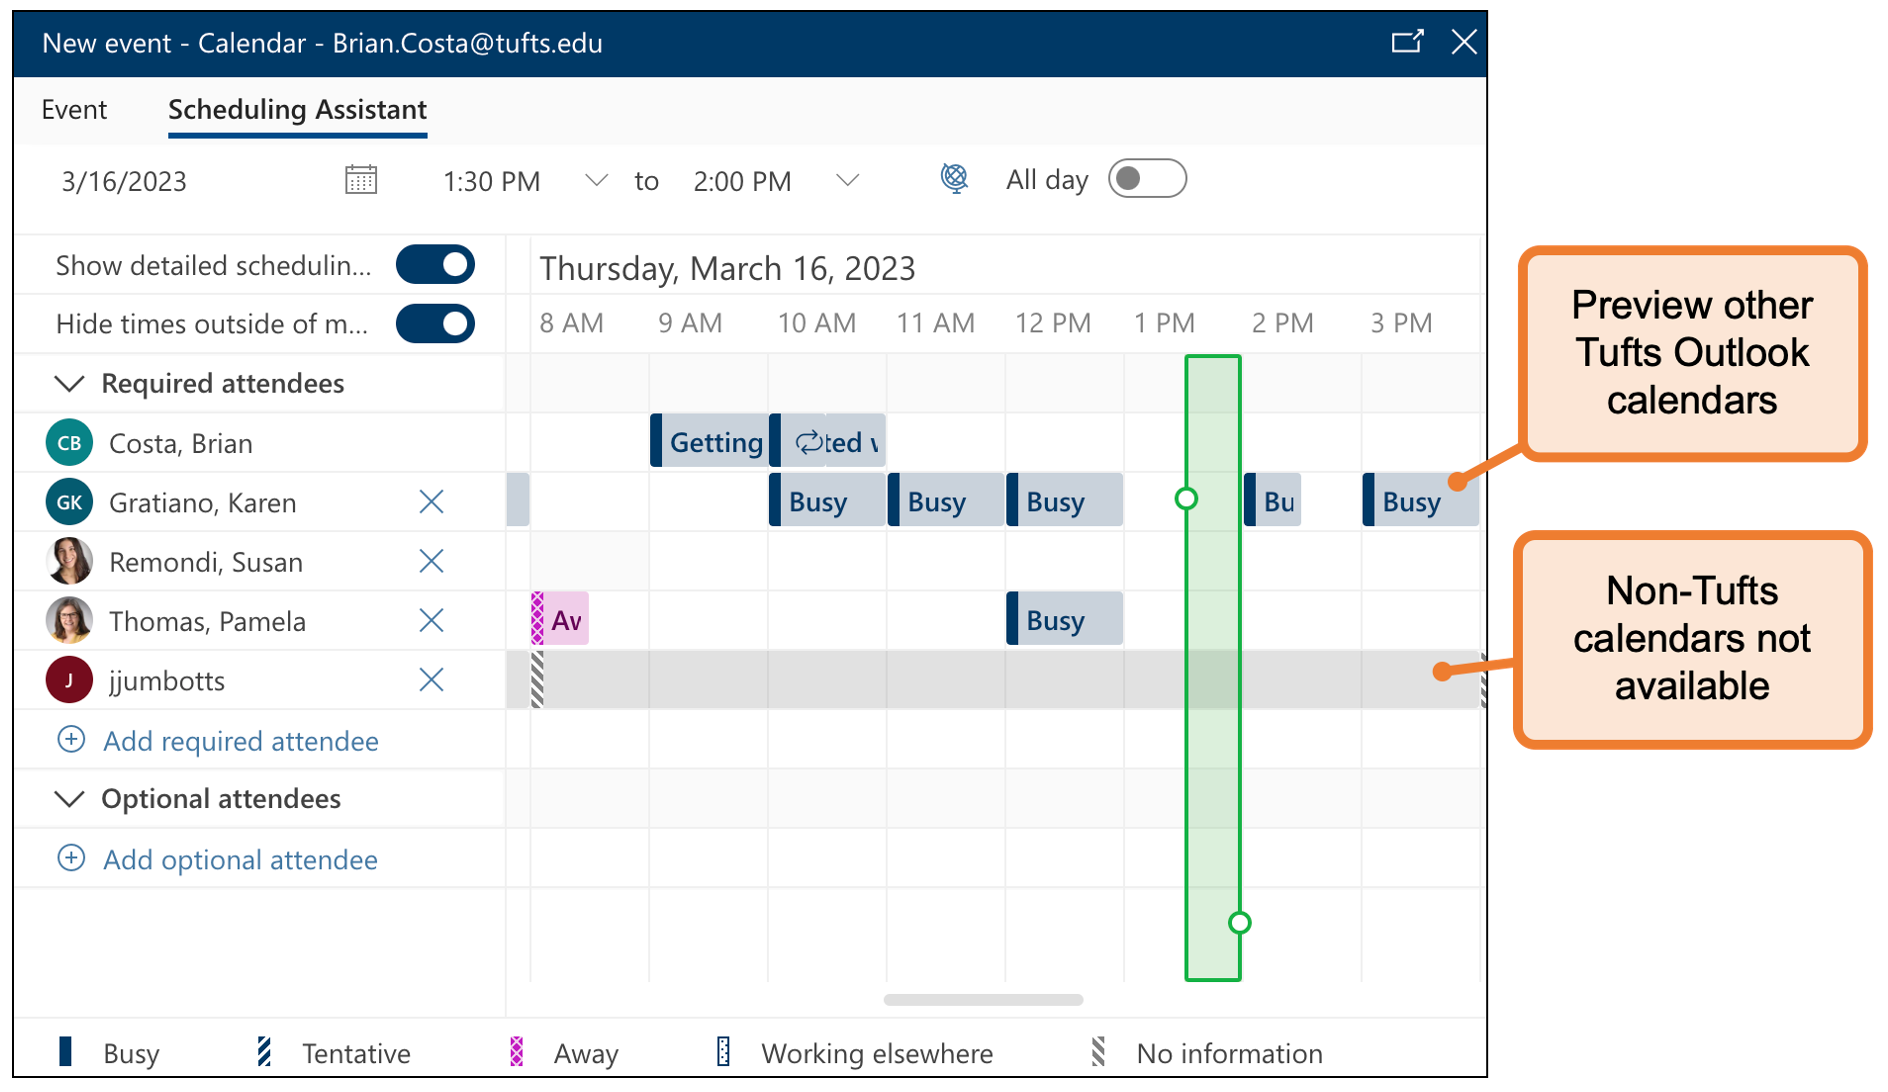
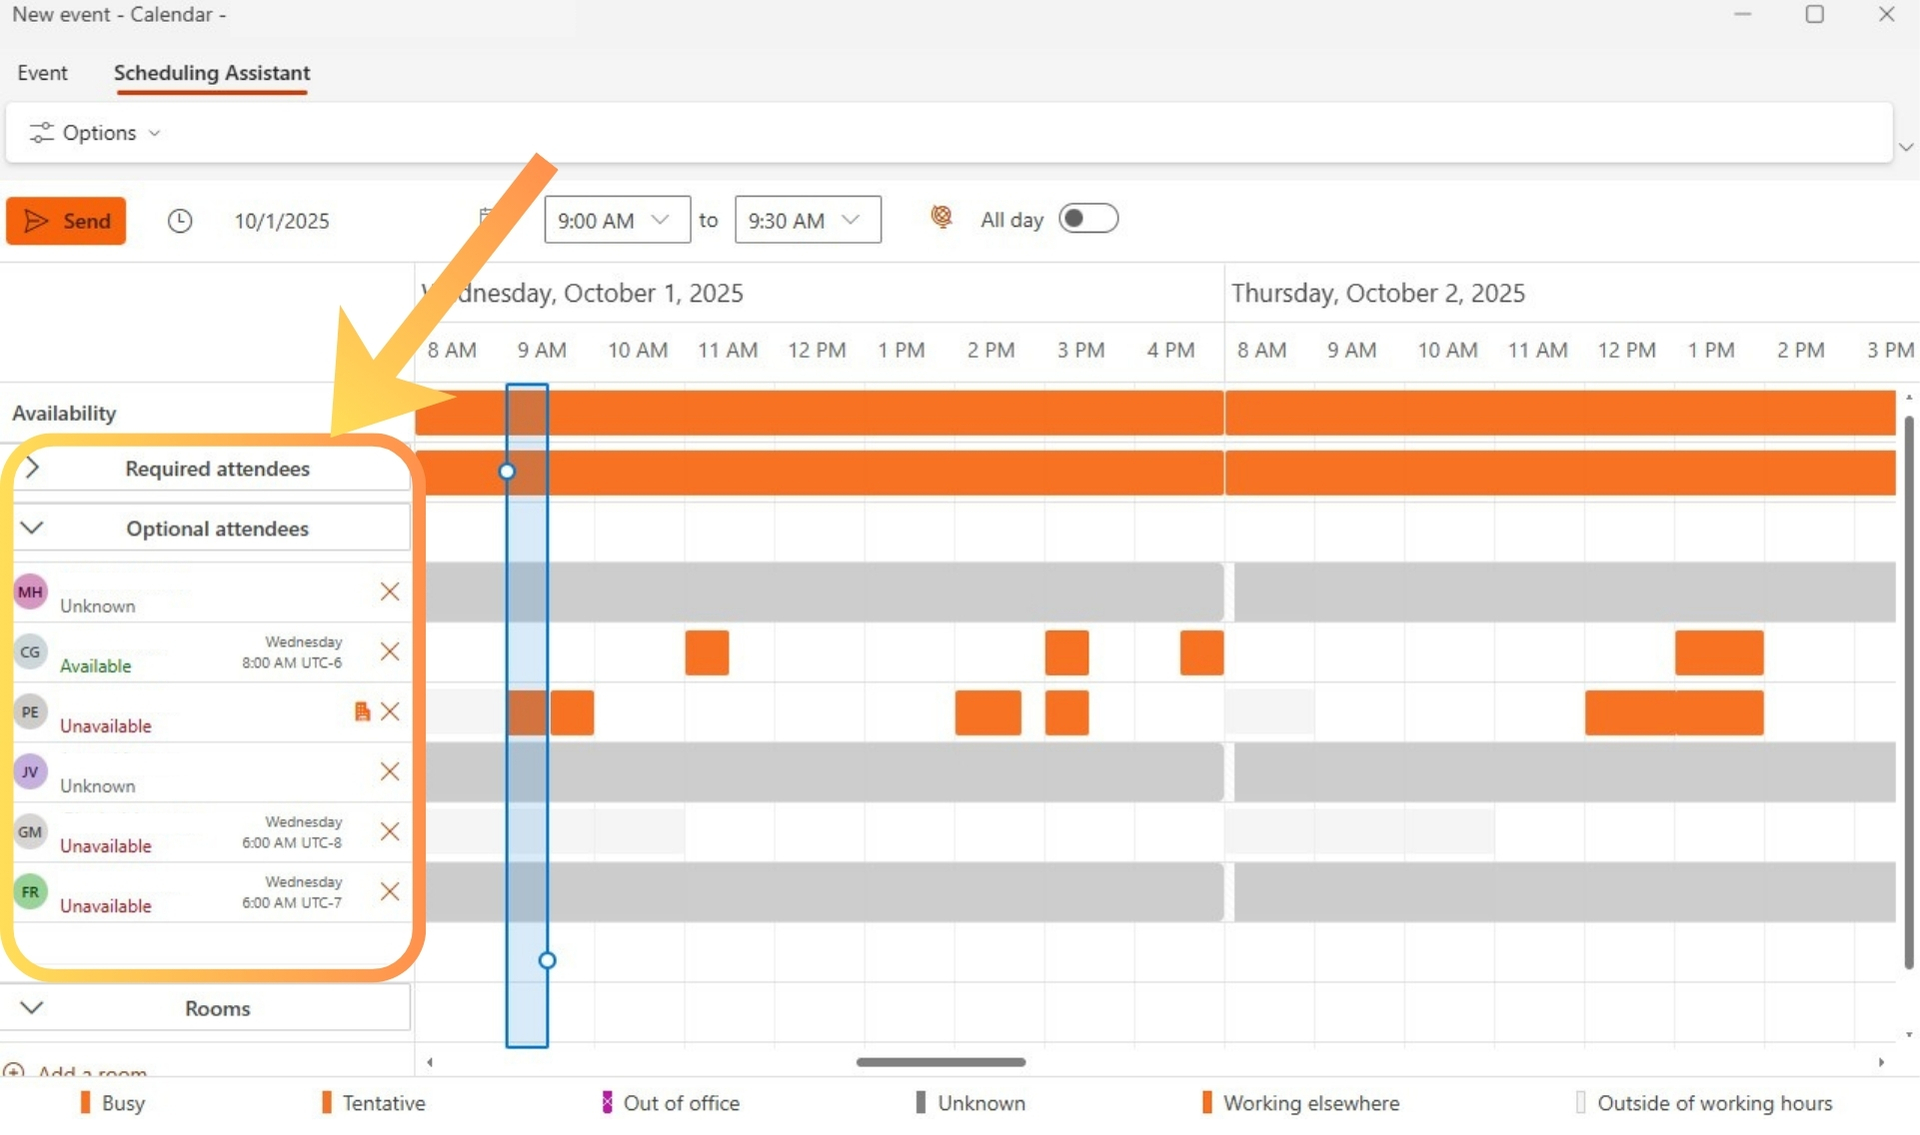
- Enter the required attendees in the To field. Type their names or email addresses and let Outlook resolve them against your address book. As soon as the list populates, the scheduling assistant pane refreshes with their calendar data. Required attendees appear with a solid bar while optional ones show a lighter shade. Review the legend at the bottom of the pane to confirm the color meanings. If someone’s calendar is not shared, the tool shows tentative or unknown blocks instead of precise availability. That limitation is normal in mixed environments. A quick workaround is to send a short “heads-up” message. Ask the person to share their calendar temporarily so you can finalize the slot without guesswork.
- Scan the suggested times listed below the grid. Outlook automatically proposes the next few open slots that fit all required attendees. Click any suggestion to preview it on the calendar view above. Adjust the meeting duration using the drop-down if the default thirty minutes feels too short or long. The pane immediately recalculates conflicts after each change. Note the time-zone indicator next to the date picker. Confirm everyone shares the same zone or adjust manually before locking in a slot. One helpful trick is to test two or three suggested times in sequence before committing. Sometimes the second or third option reveals a longer contiguous block that everyone prefers.
- Handle time-zone differences when attendees span regions. Click the Time Zones button inside the scheduling assistant pane and select the correct zones for each participant. The grid then shifts to display local times for everyone. This step prevents early-morning or late-evening surprises that often cause declines. Save the meeting as a draft at this point if you need to check one more detail. Reopen the draft later and the pane remembers your selections. In one real-world case, a global product team avoided a 6 a.m. call for their Singapore colleague. They simply toggled the time-zone view before hitting send.
- Review the final grid one last time for any yellow or red conflict indicators. Yellow means tentative acceptance while red signals a hard conflict. Drag the meeting start time slightly left or right on the grid to test nearby slots that might work better. Once a clean block appears, click Send. The assistant records the chosen time and sends the invite automatically. Recipients receive the meeting with the availability data already baked in. After sending, it is wise to glance at your own calendar one more time to confirm the block truly cleared. Occasionally cached data can lag by a minute or two.
Recurring meetings: check future weeks
Recurring Meetings Need Extra Checks
Set the recurrence pattern first, then open the scheduling assistant. The pane shows a sample week rather than every instance. Manually scan two or three future weeks to catch holidays or known out-of-office blocks that fall outside the sample. Many teams also add a private note in the meeting body reminding attendees to block recurring personal commitments such as school pick-up days that might not appear on the corporate calendar. This pairs well with Outlook 365 scheduling assistant feature map: desktop, New Outlook,…, which works through concrete examples. This pairs well with What to check in meeting assistant outlook before sending invites, which works through concrete examples.
Large Attendee Groups
When inviting more than ten people, collapse the list after the first pass. The assistant still factors everyone into suggestions but the visual grid becomes easier to read. You can expand individuals later if one person shows persistent conflicts. Another useful approach is to designate a “core attendee” group first. Lock that time, then add the remaining participants and adjust only if the new names create fresh overlaps.
Room and Resource Booking
Add conference rooms as required attendees exactly like people. The pane treats room calendars the same way and flags double-bookings on the resource side. This habit keeps physical spaces from overlapping without extra software. If your organization uses room lists, typing the list name instead of individual rooms lets the assistant suggest the first available room automatically. It saves several clicks during busy booking periods.
Follow-Up After the Meeting
Once the meeting ends, use the same assistant pane to propose a follow-up slot while everyone’s availability is still fresh. Copy the original attendee list into a new meeting and let the tool surface the next open window quickly. Keeping the same subject line with the word “Follow-up” appended makes the thread easy to locate later and maintains context for everyone involved.
Handling External Attendees
When external guests appear on the attendee list, their availability often shows as unknown in the scheduling assistant in outlook. In these cases, send a brief poll link or ask them to share a few preferred windows in advance. Once you receive their input, manually cross-check those times against the internal grid before finalizing the invite.
Scheduling assistant: consistent use reduces reschedules
Apply these steps to your next team sync and notice how many fewer reschedule requests appear in your inbox. The scheduling assistant in outlook rewards consistent use because it surfaces conflicts before they become problems. Start with a small internal meeting this week, then scale the same sequence to larger cross-functional calls. Over several weeks you will likely notice patterns. Certain days or times consistently work better for your team. This allows you to propose those windows proactively.
Practice the time-zone adjustment once so it becomes second nature when using the scheduling assistant in outlook. Over time the process takes less than two minutes yet prevents hours of back-and-forth later. The native tool stays reliable even when external meeting assistant ai options enter the conversation. Consider printing a one-page cheat sheet of the five steps for new team members. It accelerates onboarding and ensures everyone follows the same conflict-free booking process.
Finally, combine the scheduling assistant with good meeting hygiene such as clear agendas and defined end times. The combination turns Outlook from a simple calendar into a true coordination engine that respects everyone’s time and keeps projects moving forward without unnecessary friction.
- Common Calendar Coordination Scenarios Solved by Outlook Scheduling Features
- Desktop Outlook Versus Mac and Web Versions for Meeting Coordination
- Shared Calendar Assistants Compared to Virtual Meeting Helpers
- Virtual Scheduling Assistants in Distributed Teams
- Connecting Calendars to a Virtual Scheduling Assistant